Dynamic Content in Angular
Multiple ways to create Angular components dynamically at runtime.
Multiple ways to create Angular components dynamically at runtime.
In this article, I am going to show you several ways of creating dynamic content in Angular. You will get examples of custom list templates, dynamic component creation, runtime component and module compilation. Full source code will be available at the end of the article.
We are going to see how your Angular components can be enriched with custom templating support. We will start by building a simple list component that supports external row templates declared by the application developer.
First, let’s create a simple list component to display bound items collection:
@Component({
  selector: 'tlist',
  template: `
    <ul>
      <li *ngFor="let item of items">
        {{ item.title }}
      </li>
    </ul>
  `,
})
export class TListComponent {
  @Input()
  items: any[] = [];
}
Now update your main application component or create a separate demo component tlist.component.demo.ts like in the following example:
@Component({
  selector: 'tlist-demo',
  template: `
    <h1>Templated list</h1>
    <tlist [items]="items"></tlist>
  `,
})
export class AppComponent {
  items: any[] = [
    { title: 'Item 1' },
    { title: 'Item 2' },
    { title: 'Item 3' },
  ];
}
This will render an unordered HTML list like this:
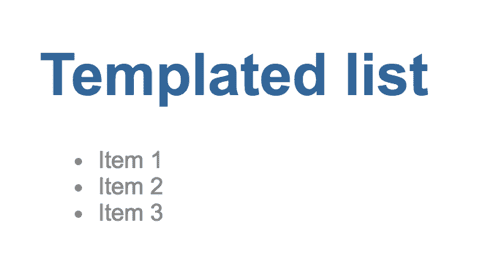
So we got a simple list component that binds to an array of objects and renders standard unordered HTML list where every list item is bound to the title property value. Now let’s change the code to provide support for external templates. Update the code of the tlist.component.ts file as shown below:
import { Component, Input, ContentChild, TemplateRef } from '@angular/core';

@Component({
  selector: 'tlist',
  template: `
    <ul>
      <template ngFor [ngForOf]="items" [ngForTemplate]="template"> </template>
    </ul>
  `,
})
export class TListComponent {
  @ContentChild(TemplateRef)
  template: TemplateRef<any>;

  @Input()
  items: any[] = [];
}
Now TListComponent expects a template reference to be defined as its content child.
It will then take template content and apply to each *ngFor entry.
So application developers that are using this component will be able to define entire row template like following:
<tlist [items]="items">
  <template>
    <li>
      Row template content
    </li>
  </template>
</tlist>
Now update the tlist.component.demo.ts like in the example below:
import { Component } from '@angular/core';

@Component({
  selector: 'tlist-demo',
  template: `
    <div>
      <h2>Templated list</h2>
      <tlist [items]="items">
        <template let-item="$implicit" let-i="index">
          <li>[{{ i }}] Hello: {{ item.title }}</li>
        </template>
      </tlist>
    </div>
  `,
})
export class TListComponentDemo {
  items: any[] = [
    { title: 'Item 1' },
    { title: 'Item 2' },
    { title: 'Item 3' },
  ];
}
In order to access underlying data-binding context for each row we map it to the item variable by means of let-item="$implicit" attribute.
So item will point to an entry of the items collection of TListComponentDemo and will be able binding to the title property.
Additionally we assign row index property value to the i variable via let-i="index".
Another improvement is that TListComponent no longer enforces all bound objects to have title property.
Now both the template and underlying context are defined at the application level.
Here’s how the result will be rendered with the changes made:
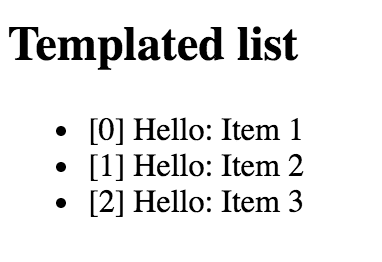
Imagine cases when your Angular components have complex layouts hidden from application developers but at the same time provide a great level of customization by means of custom templates.
Another common scenario is changing the content of the component based on some condition. For example rendering different child component based on the value of the type property:
<component type="my-type-1"></component>
<component type="my-type-2"></component>
Let’s start with the basic component structure:
@Component({
  selector: 'dynamic-content',
  template: `
    <div>
      <div #container></div>
    </div>
  `,
})
export class DynamicContentComponent {
  @ViewChild('container', { read: ViewContainerRef })
  container: ViewContainerRef;

  @Input()
  type: string;
}
Note the container usage. It will be used as injection point,
all dynamic content will be inserted in the DOM below this element.
There’s also a property of ViewContainerRef type to allow you accessing container from code.
This component can be later used like following:
<dynamic-content type="some-value"></dynamic-type>Now let’s introduce 2 simple components to display based on type value
and 1 additional fallback component for unknown types.
You will also need string to type mapping to be able converting component to corresponding string.
This may be a separate injectable service (recommended) or part of the component implementation:
private mappings = {
  'sample1': DynamicSample1Component,
  'sample2': DynamicSample2Component
};

getComponentType(typeName: string) {
  let type = this.mappings[typeName];
  return type || UnknownDynamicComponent;
}
For a missing type name the UnknownDynamicComponent will be returned automatically.
Finally we are ready to create components dynamically. Here’s the simplified version of the component with main blocks of interest:
export class DynamicContentComponent implements OnInit, OnDestroy {
  private componentRef: ComponentRef<{}>;

  constructor(private componentFactoryResolver: ComponentFactoryResolver) {}

  ngOnInit() {
    if (this.type) {
      let componentType = this.getComponentType(this.type);
      let factory = this.componentFactoryResolver.resolveComponentFactory(
        componentType
      );
      this.componentRef = this.container.createComponent(factory);
    }
  }

  ngOnDestroy() {
    if (this.componentRef) {
      this.componentRef.destroy();
      this.componentRef = null;
    }
  }
}
Please note that every component you are going to create dynamically
must be registered within the entryComponents section of your module:
@NgModule({
  imports: [...],
  declarations: [...],
  entryComponents: [
    DynamicSample1Component,
    DynamicSample2Component,
    UnknownDynamicComponent
  ],
  bootstrap: [ AppComponent ]
})
export class AppModule { }
You can now test all 3 cases:
<dynamic-content type="sample1"></dynamic-content>
<dynamic-content type="sample2"></dynamic-content>
<dynamic-content type="some-other-type"></dynamic-content>In most of the cases you will probably want passing some runtime context to newly created child components.
The easiest way to maintain different types of dynamic components is creating a common interface or abstract class. For example:
abstract class DynamicComponent {
  context: any;
}
For the sake of simplicity I was using any type for the context,
for real-life scenarios you may want declaring the type to benefit from static checks.
All previously created components can now be updated to take context into account:
export abstract class DynamicComponent {
  context: any;
}

@Component({
  selector: 'dynamic-sample-1',
  template: `
    <div>Dynamic sample 1 ({{ context?.text }})</div>
  `,
})
export class DynamicSample1Component extends DynamicComponent {}

@Component({
  selector: 'dynamic-sample-2',
  template: `
    <div>Dynamic sample 2 ({{ context?.text }})</div>
  `,
})
export class DynamicSample2Component extends DynamicComponent {}

@Component({
  selector: 'unknown-component',
  template: `
    <div>Unknown component ({{ context?.text }})</div>
  `,
})
export class UnknownDynamicComponent extends DynamicComponent {}
And dynamic component needs to be updated as well:
export class DynamicContentComponent implements OnInit, OnDestroy {
  // ...

  @Input()
  context: any;

  // ...

  ngOnInit() {
    if (this.type) {
      ...

      let instance = <DynamicComponent> this.componentRef.instance;
      instance.context = this.context;
    }
  }
}
With the changes above you are now able binding context object from within parent components. Here’s a quick demo:
@Component({
  selector: 'dynamic-component-demo',
  template: `
    <div>
      <h2>Dynamic content</h2>

      <h3>Context: <input type="text" [(ngModel)]="context.text" /></h3>

      <dynamic-content type="sample1" [context]="context"></dynamic-content>
      <dynamic-content type="sample2" [context]="context"></dynamic-content>
      <dynamic-content
        type="some-other-type"
        [context]="context"
      ></dynamic-content>
    </div>
  `,
})
export class DynamicContentComponentDemo {
  context: any = {
    text: 'test',
  };
}
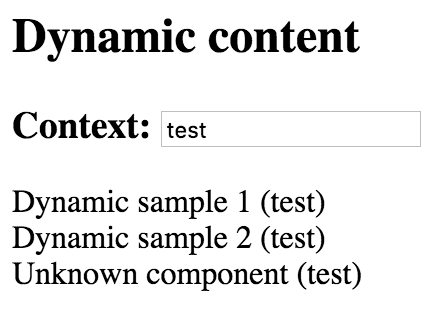
At run-time you now should be able to see three components (including fallback Unknown one).
Upon changing the text in the Context input box all widgets will be automatically updated.
Dynamic forms and form persistence is the best example. If you need displaying form (or composite component) based on a definition file (JSON, XML, etc.) you may end up having a dynamic component that builds final content based on the schema and/or persisted state, and a form component built from multiple dynamic content containers.
For some advanced scenarios you might want taking full control over Angular component/template compilation.
In this walkthrough we are going to implement the following features:
Component on the fly (user defined template + class)NgModule on the fly (with component created)The implementation can be pretty much based on Dynamic Component from the previous walkthrough.
As a start you will need a basic component with a dedicated placeholder to inject content:
@Component({
  selector: 'runtime-content',
  template: `
    <div>
      <div #container></div>
    </div>
  `,
})
export class RuntimeContentComponent {
  @ViewChild('container', { read: ViewContainerRef })
  container: ViewContainerRef;
}
We are going to allow users editing component template, so let’s add a basic UI for that
@Component({
  selector: 'runtime-content',
  template: `
    <div>
      <h3>Template</h3>

      <div>
        <textarea rows="5" [(ngModel)]="template"></textarea>
      </div>

      <button (click)="compileTemplate()">Compile</button>

      <h3>Output</h3>

      <div #container></div>
    </div>
  `,
})
export class RuntimeContentComponent {
  template: string = '<div>\nHello, {{name}}\n</div>';

  // ...
}
Note: in order to use ngModel you will need importing and referencing FormsModule within your AppModule:
import { NgModule } from '@angular/core';
import { BrowserModule } from '@angular/platform-browser';
import { FormsModule } from '@angular/forms';

@NgModule({
  imports: [BrowserModule, FormsModule],
  declarations: [...],
  bootstrap: [ AppComponent ]
})
export class AppModule { }
When rendered it should look like following:
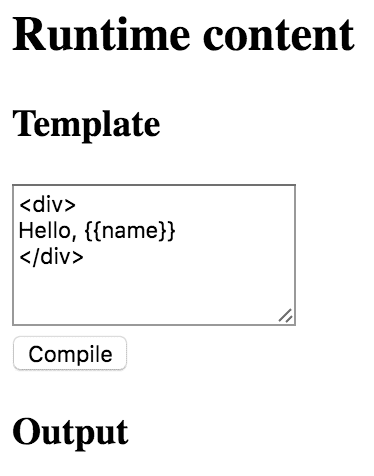
Now the most important part of the component implementation, the runtime compilation:
export class RuntimeContentComponent {
  private createComponentFactorySync(
    compiler: Compiler,
    metadata: Component,
    componentClass: any
  ): ComponentFactory<any> {
    const cmpClass =
      componentClass ||
      class RuntimeComponent {
        name: string = 'Denys';
      };
    const decoratedCmp = Component(metadata)(cmpClass);

    @NgModule({ imports: [CommonModule], declarations: [decoratedCmp] })
    class RuntimeComponentModule {}

    let module: ModuleWithComponentFactories<
      any
    > = compiler.compileModuleAndAllComponentsSync(RuntimeComponentModule);
    return module.componentFactories.find(
      f => f.componentType === decoratedCmp
    );
  }
}
The code above takes custom metadata and optionally a component class.
If no class is provided the fallback RuntimeComponent one will be used with a name property predefined.
This what we’ll be using for testing. Then resulting component gets decorated with the metadata provided.
Next, a RuntimeComponentModule module is created with predefined CommonModule import
(you may extend the list if needed), and decorated component created earlier as part of the declarations section.
Finally function uses Angular Compiler service to compile the module and included components.
Compiled module provides access to the underlying component factories and this is exactly what we needed.
For the last step, we need wiring Compile button with the following code:
export class RuntimeContentComponent {
  compileTemplate() {
    let metadata = {
      selector: `runtime-component-sample`,
      template: this.template,
    };

    let factory = this.createComponentFactorySync(
      this.compiler,
      metadata,
      null
    );

    if (this.componentRef) {
      this.componentRef.destroy();
      this.componentRef = null;
    }
    this.componentRef = this.container.createComponent(factory);
  }
}
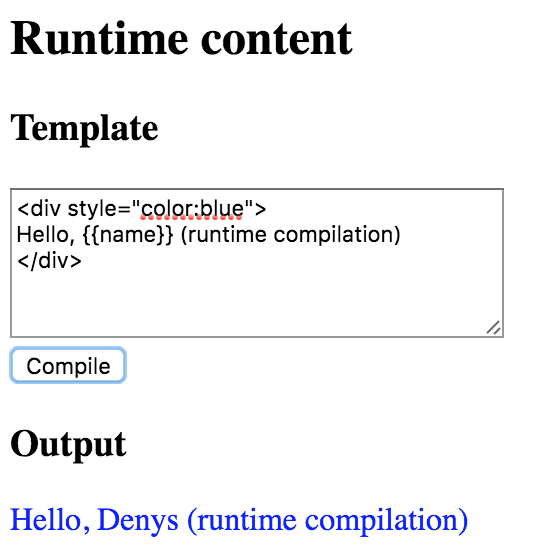
Every time user clicks the Compile button component takes the template value,
compiles new component of it (backed by the RuntimeComponent class with the predefined name property) and renders:
The best option if you want storing component templates somewhere externally and building components on the fly (RAD environments, online creators, etc.)
You can get all source code and a working example project from this GitHub repository.